My solution for working with resin in cold temperatures
It’s cold outside!
UPDATE - I’ve added more photos and links to this post. I’m still amazed at how well this setup works. I’ve completed numerous resin projects so far, and it works like a dream every single time! :)


If you’ve spent some time browsing my website before, you’ve probably noticed the limited edition prints that I produce (click here). One of the print types that I offer is a resin embellished metal version that really makes things sparkle and shine. When I first started working with resin, my first thought was “this is really easy.” Keep in mind that this was during the warm summer months, so I got spoiled really quick. While the ‘easiness’ can still hold true, or at least most of the time, there is one thing to be aware of— cold weather. Not necessarily cold weather itself, but a cold room. Basically any room where the temps are below 72°F.
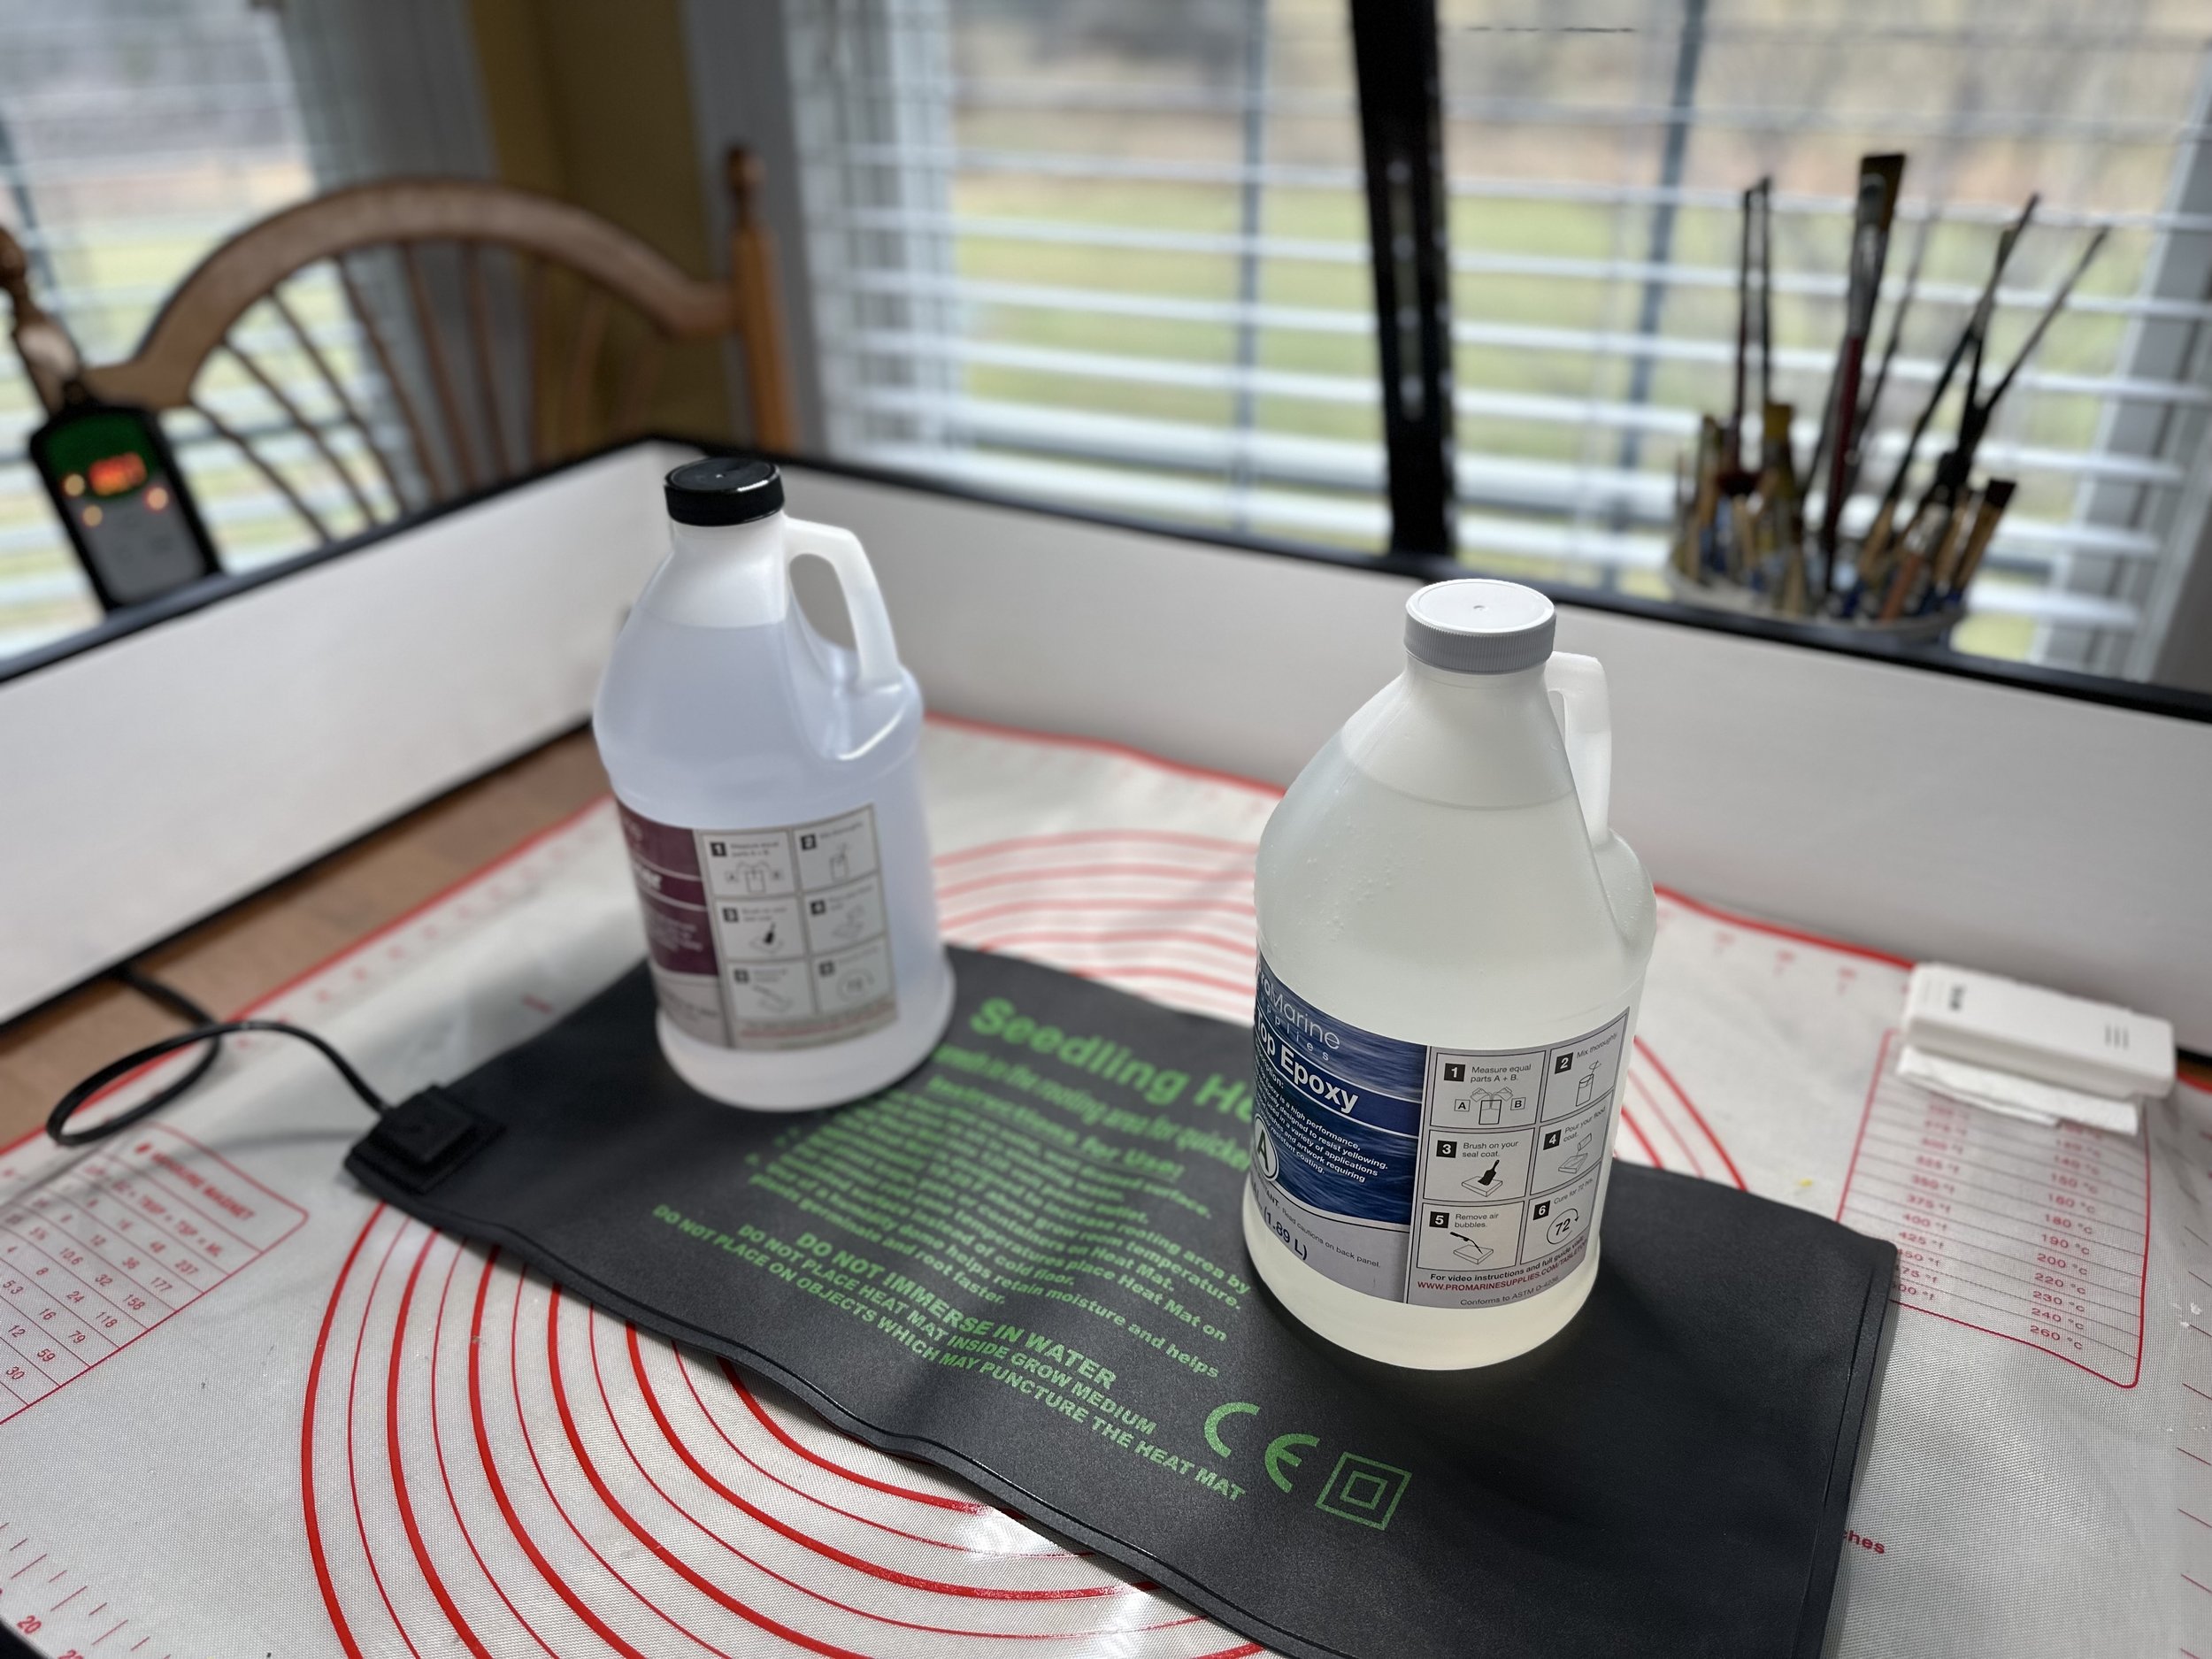
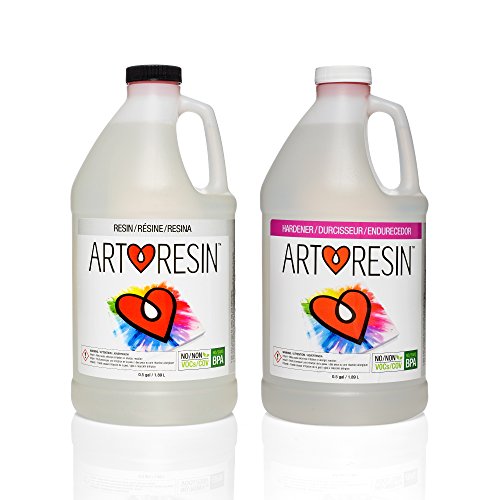
The brand of resin that I typically use is ArtResin. While it tends to be a little pricier than other options you’ll find out there, it does come with a lot of benefits. One, it’s an absolute dream to work with, but my main reason is the lack of odor. I need to work on other things while the resin is curing, so I can’t abandon my studio for a day while the resin is drying/curing. Wearing a respirator in my studio 24x7 isn’t ideal either.
Avoiding the sky high electric bill
Anyway, back to working with resin in cold temperatures. If you’re like me, you try to avoid $500+ electric bills during the winter time, so you tend to keep the thermostat set at a more reasonable level. Maybe somewhere in the 70°F range. It seems like a reasonable temperature, and maybe everyone is happy with it, but the resin sure isn’t. It’s going to let you know from the very beginning. It pours from the bottle like 50 year old molasses and contains more air bubbles than there are stars in the Milky Way. If you manage to get all of the air bubbles out with your torch, the drying process is going to take a lot longer than it should and will either have that orange peel look or be very wavy.
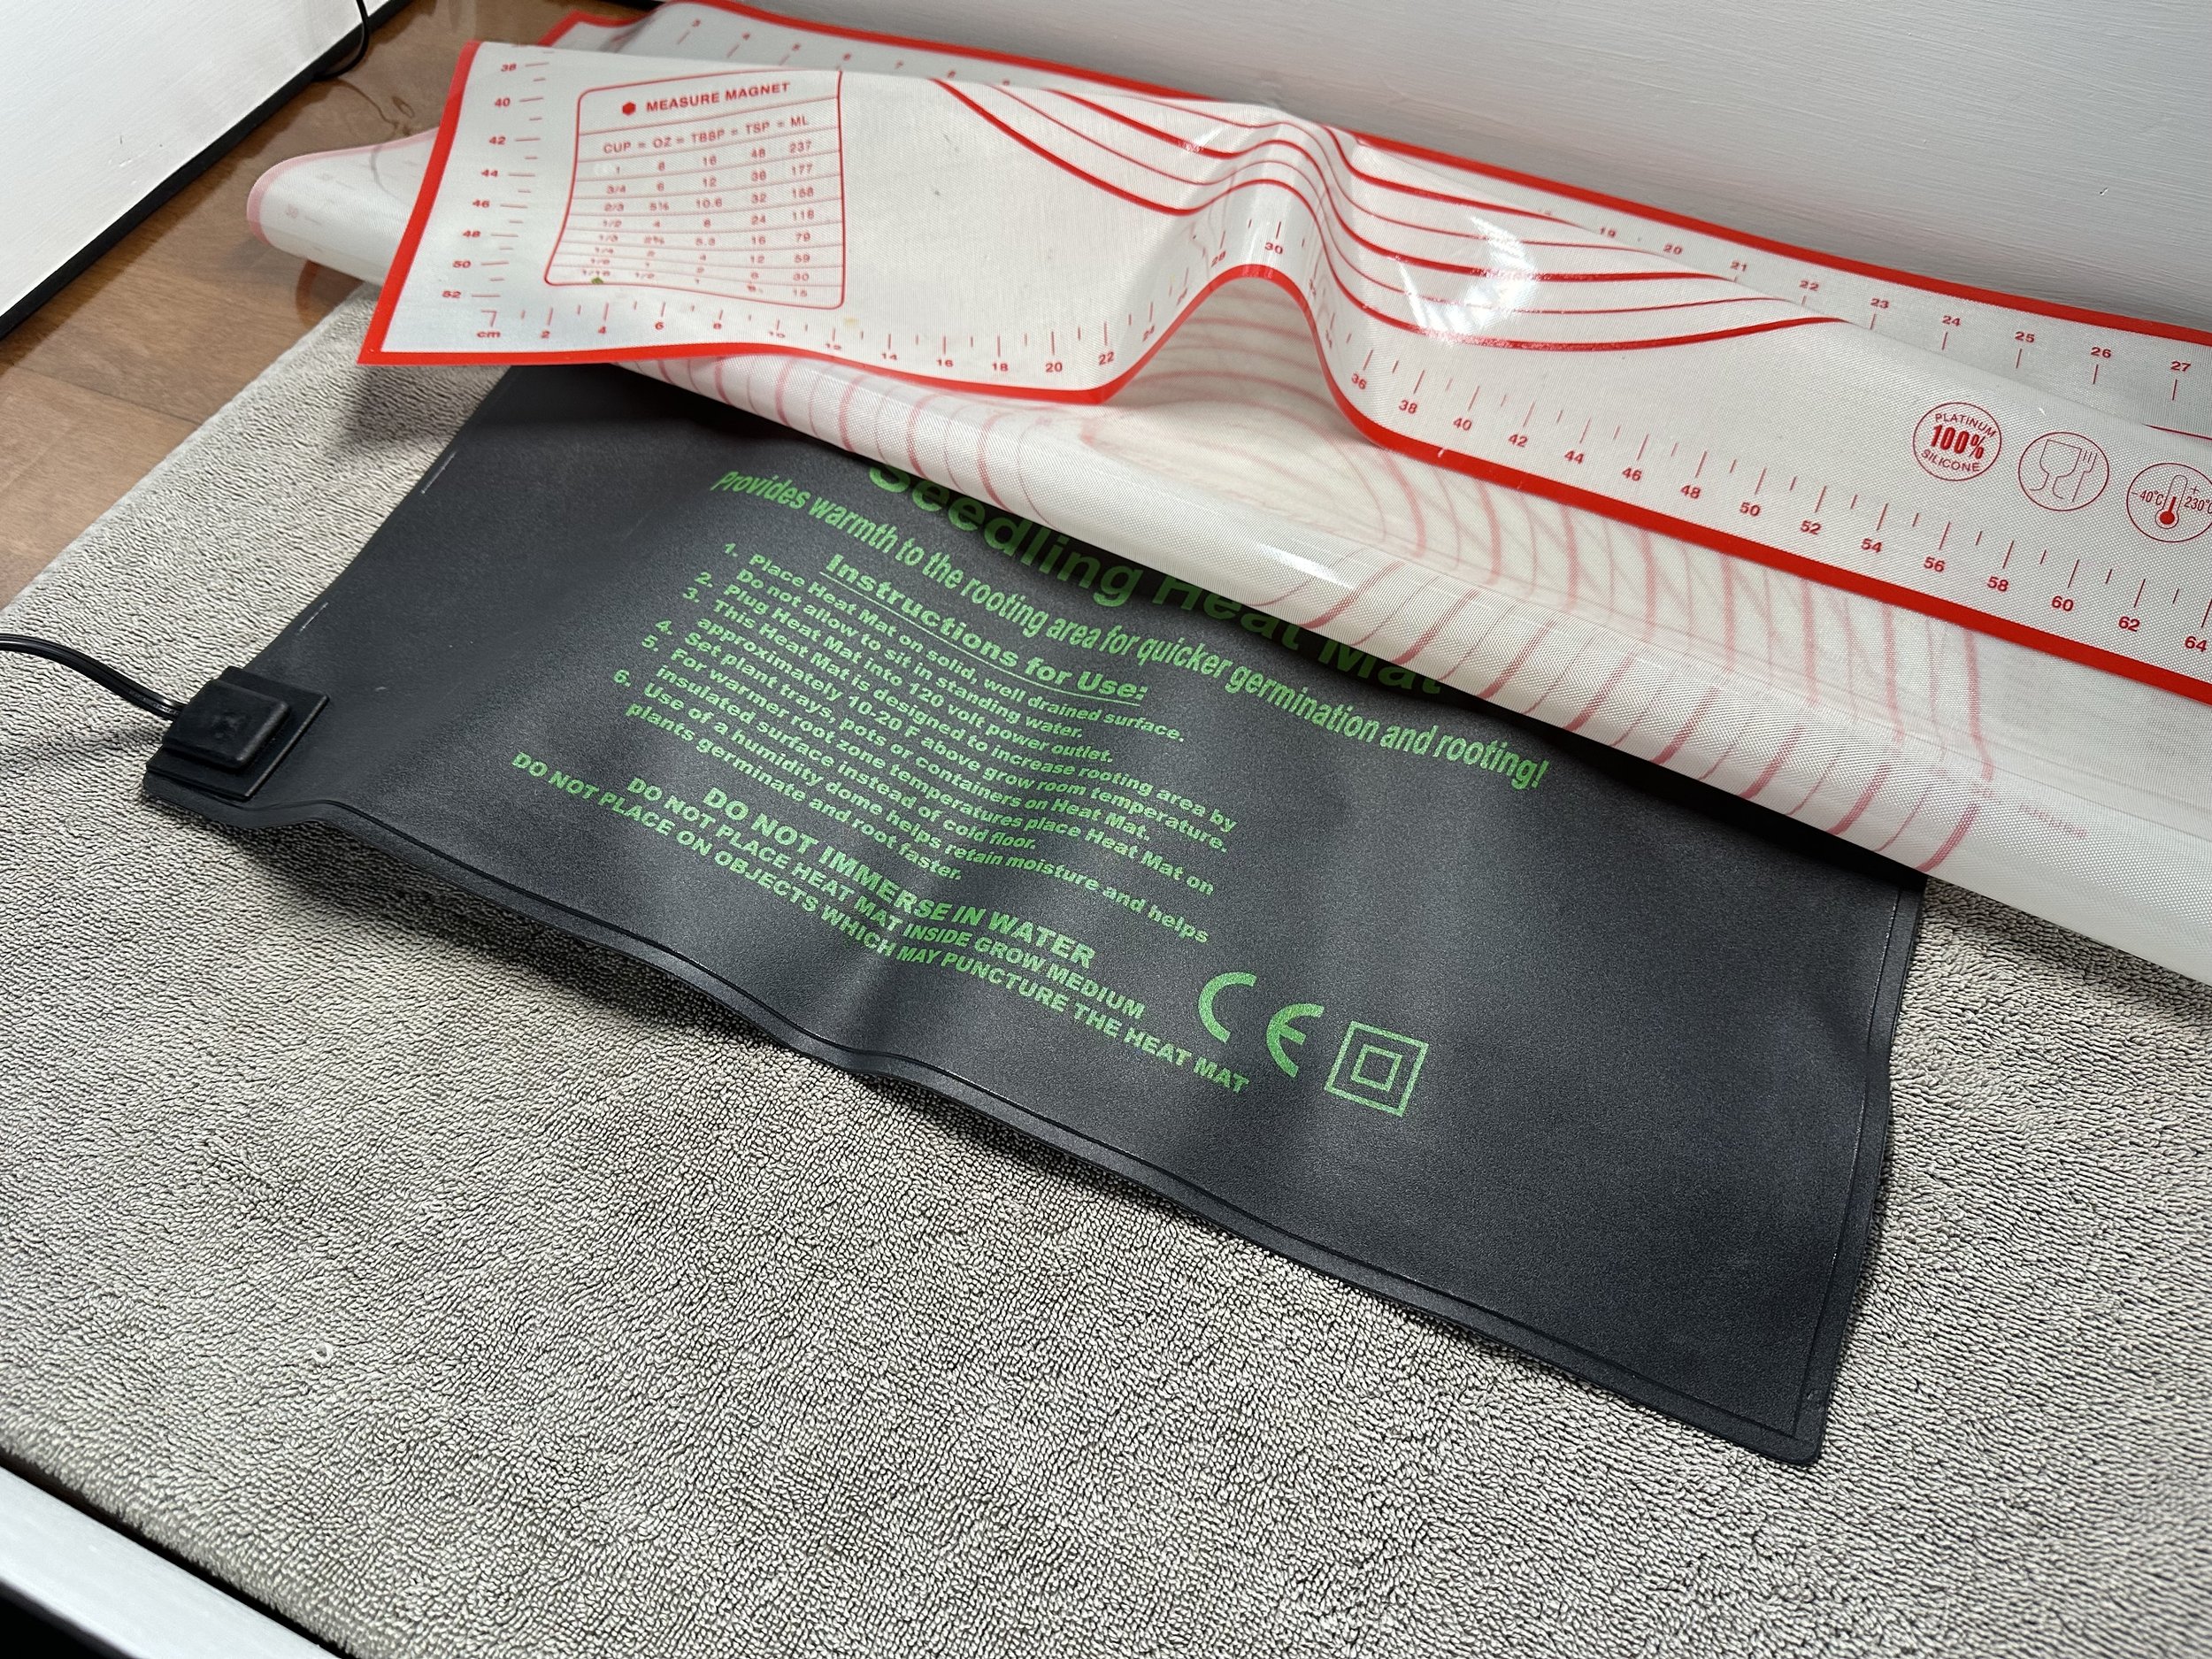
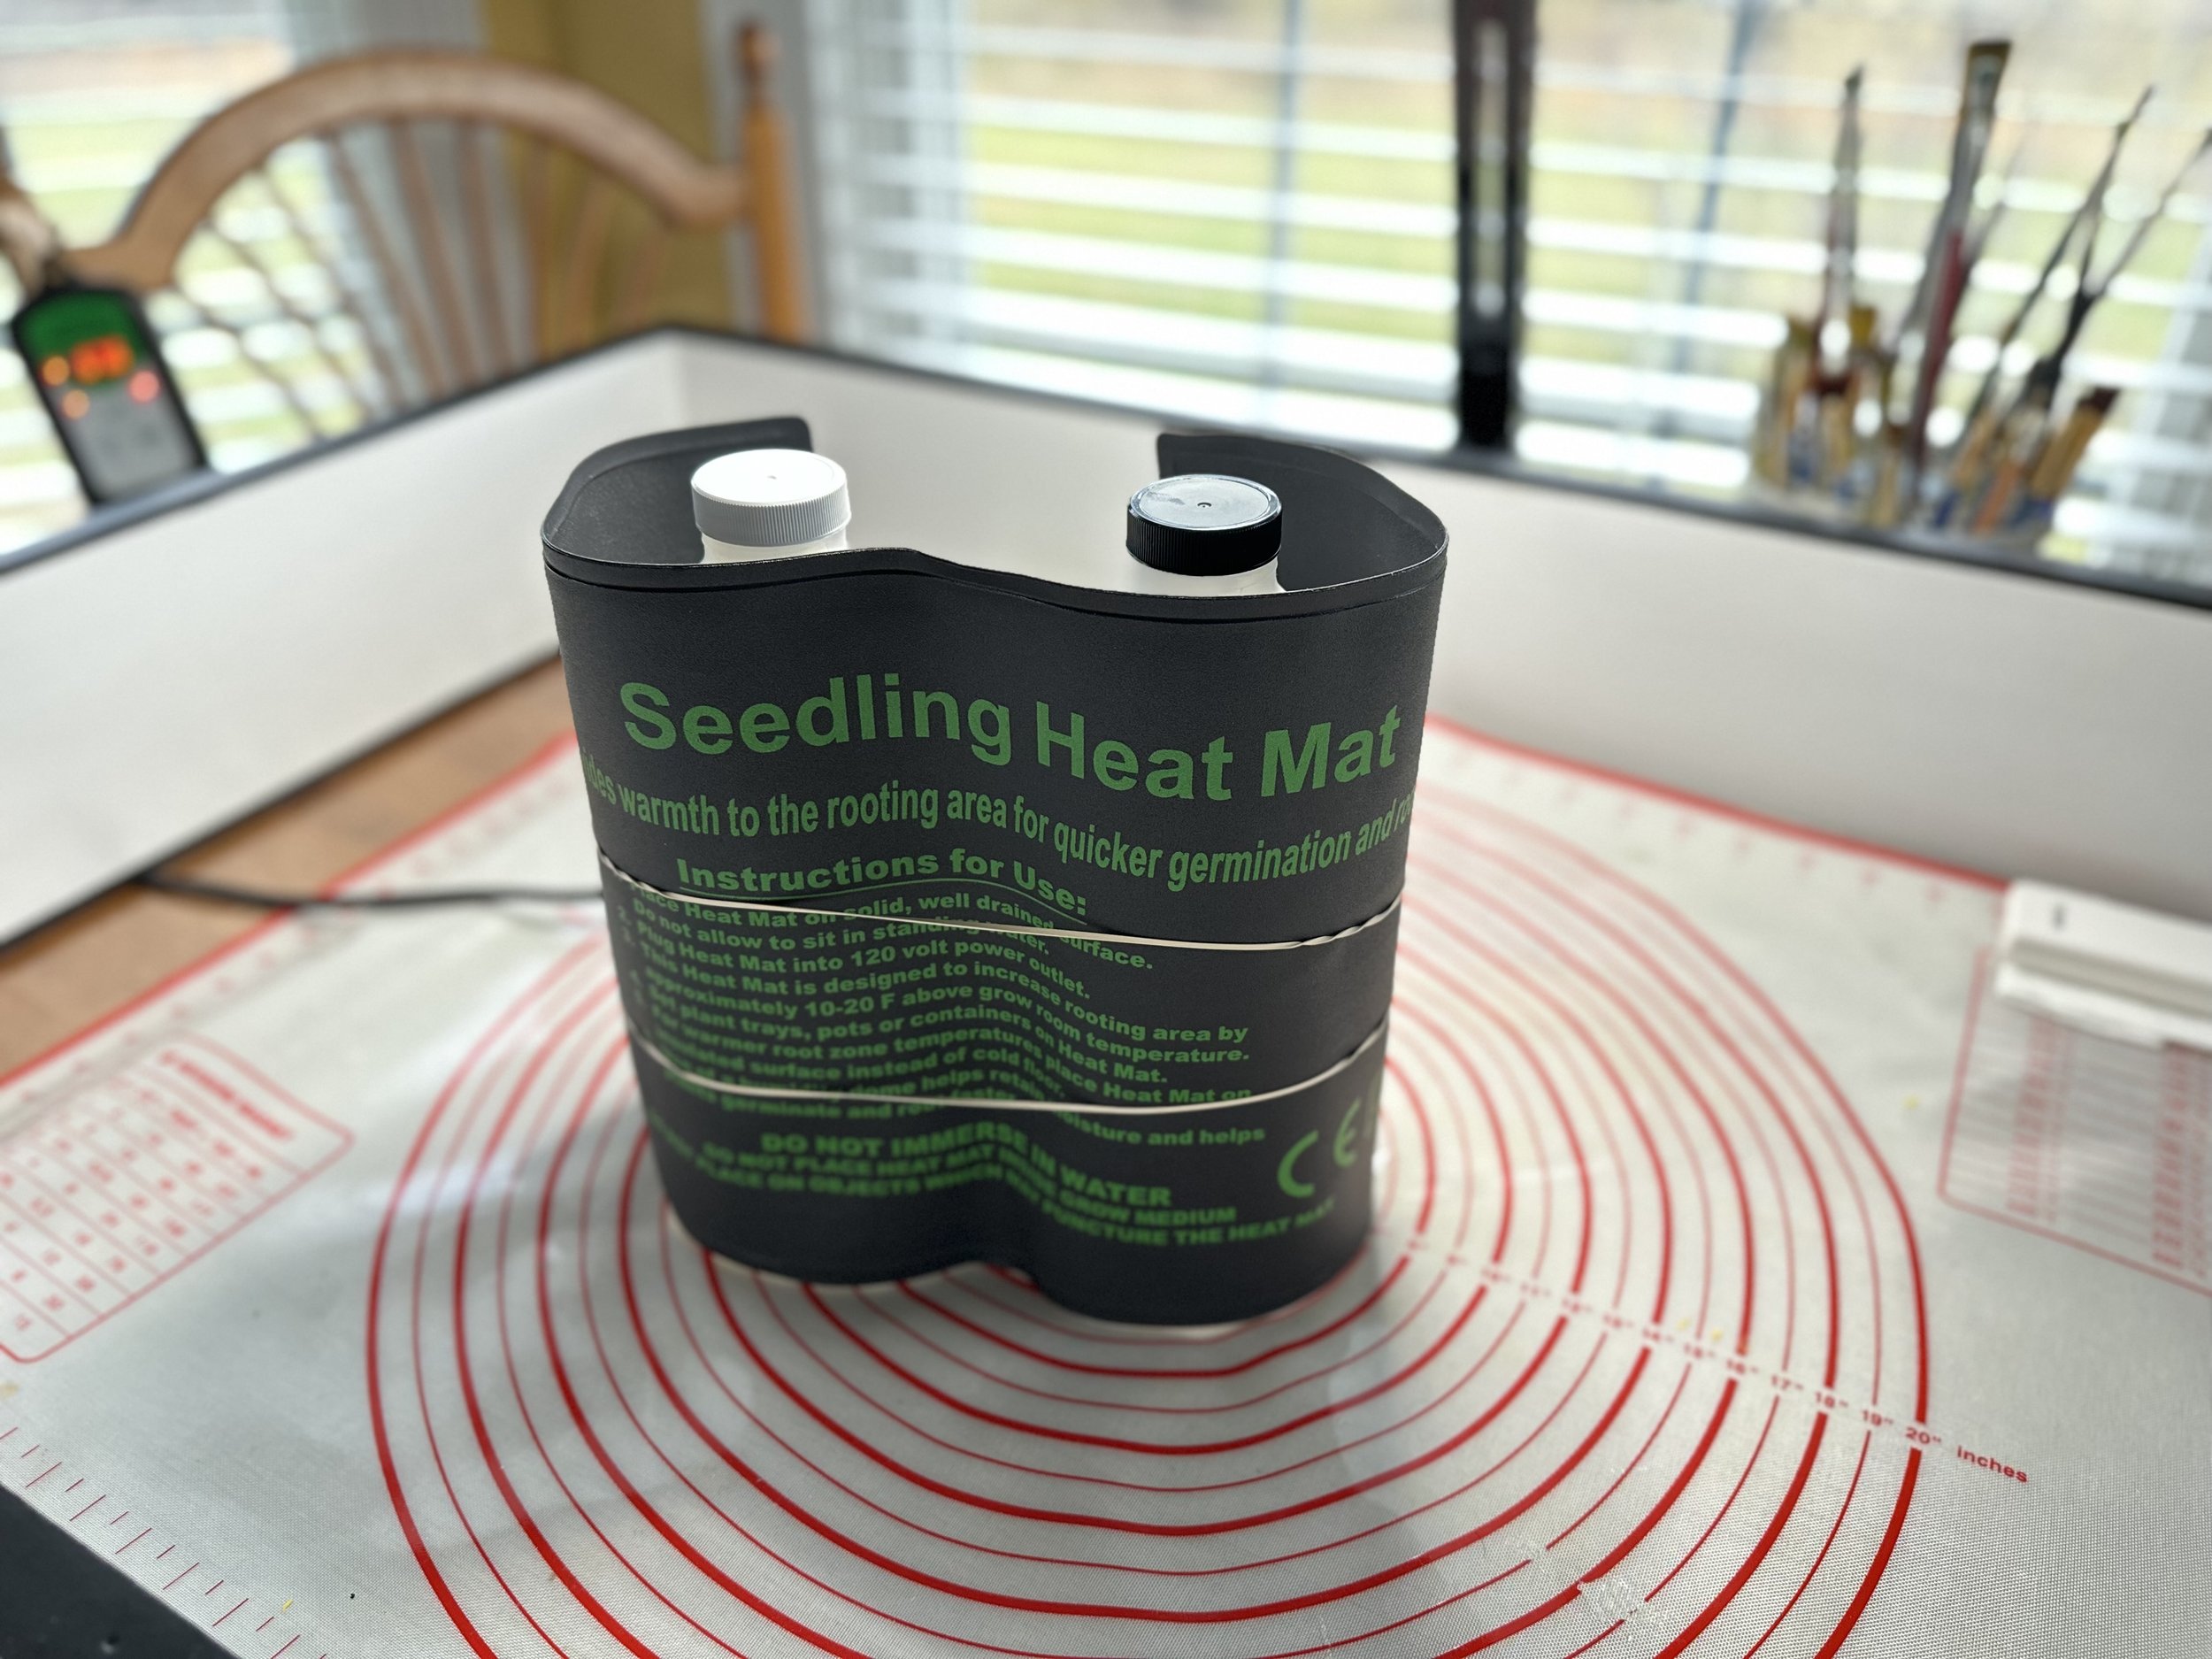
Keep in mind that the temperature of your resin is not necessarily consistent with what your thermostat setting is. If you have the resin containers sitting on a cold shelf or even the floor, then the temps could be 5° to 10°F colder. One of the best ways that I’ve found to warm your resin (resin and hardener) before you start mixing it is to sit the containers down into the sink, then partially fill it with warm water. Make sure the lids are on tight before you do this. You’ll quickly waste a lot of resin if it comes in direct contact with the water. I use the 1/2 gallon containers and sit a board or something else on top of them to keep them from tipping over. Another way is wrapping them in the seedling mat for about an hour (as pictured above). It all depends on how quick you want to start your resin project that day. More about the seedling mat later…
Too warm is not good either
Don’t let the resin stay in the warm water too long. I’ve found that 5 minutes is usually just about right. It’s best to wiggle the container around after you’ve removed it from the sink and dried it off, to make sure the consistency is where it needs to be. If the water was too hot, or you let it sit in the sink too long, then the resin becomes too thin. Applying thin resin is almost like applying water. Let the containers sit at room temperature for about 15 minutes if you notice that it’s too thin and you’ll be able to properly mix it after this. If you’re using the seedling mat to heat them, you’ll need to play around about with the temps to find out what works best for you.
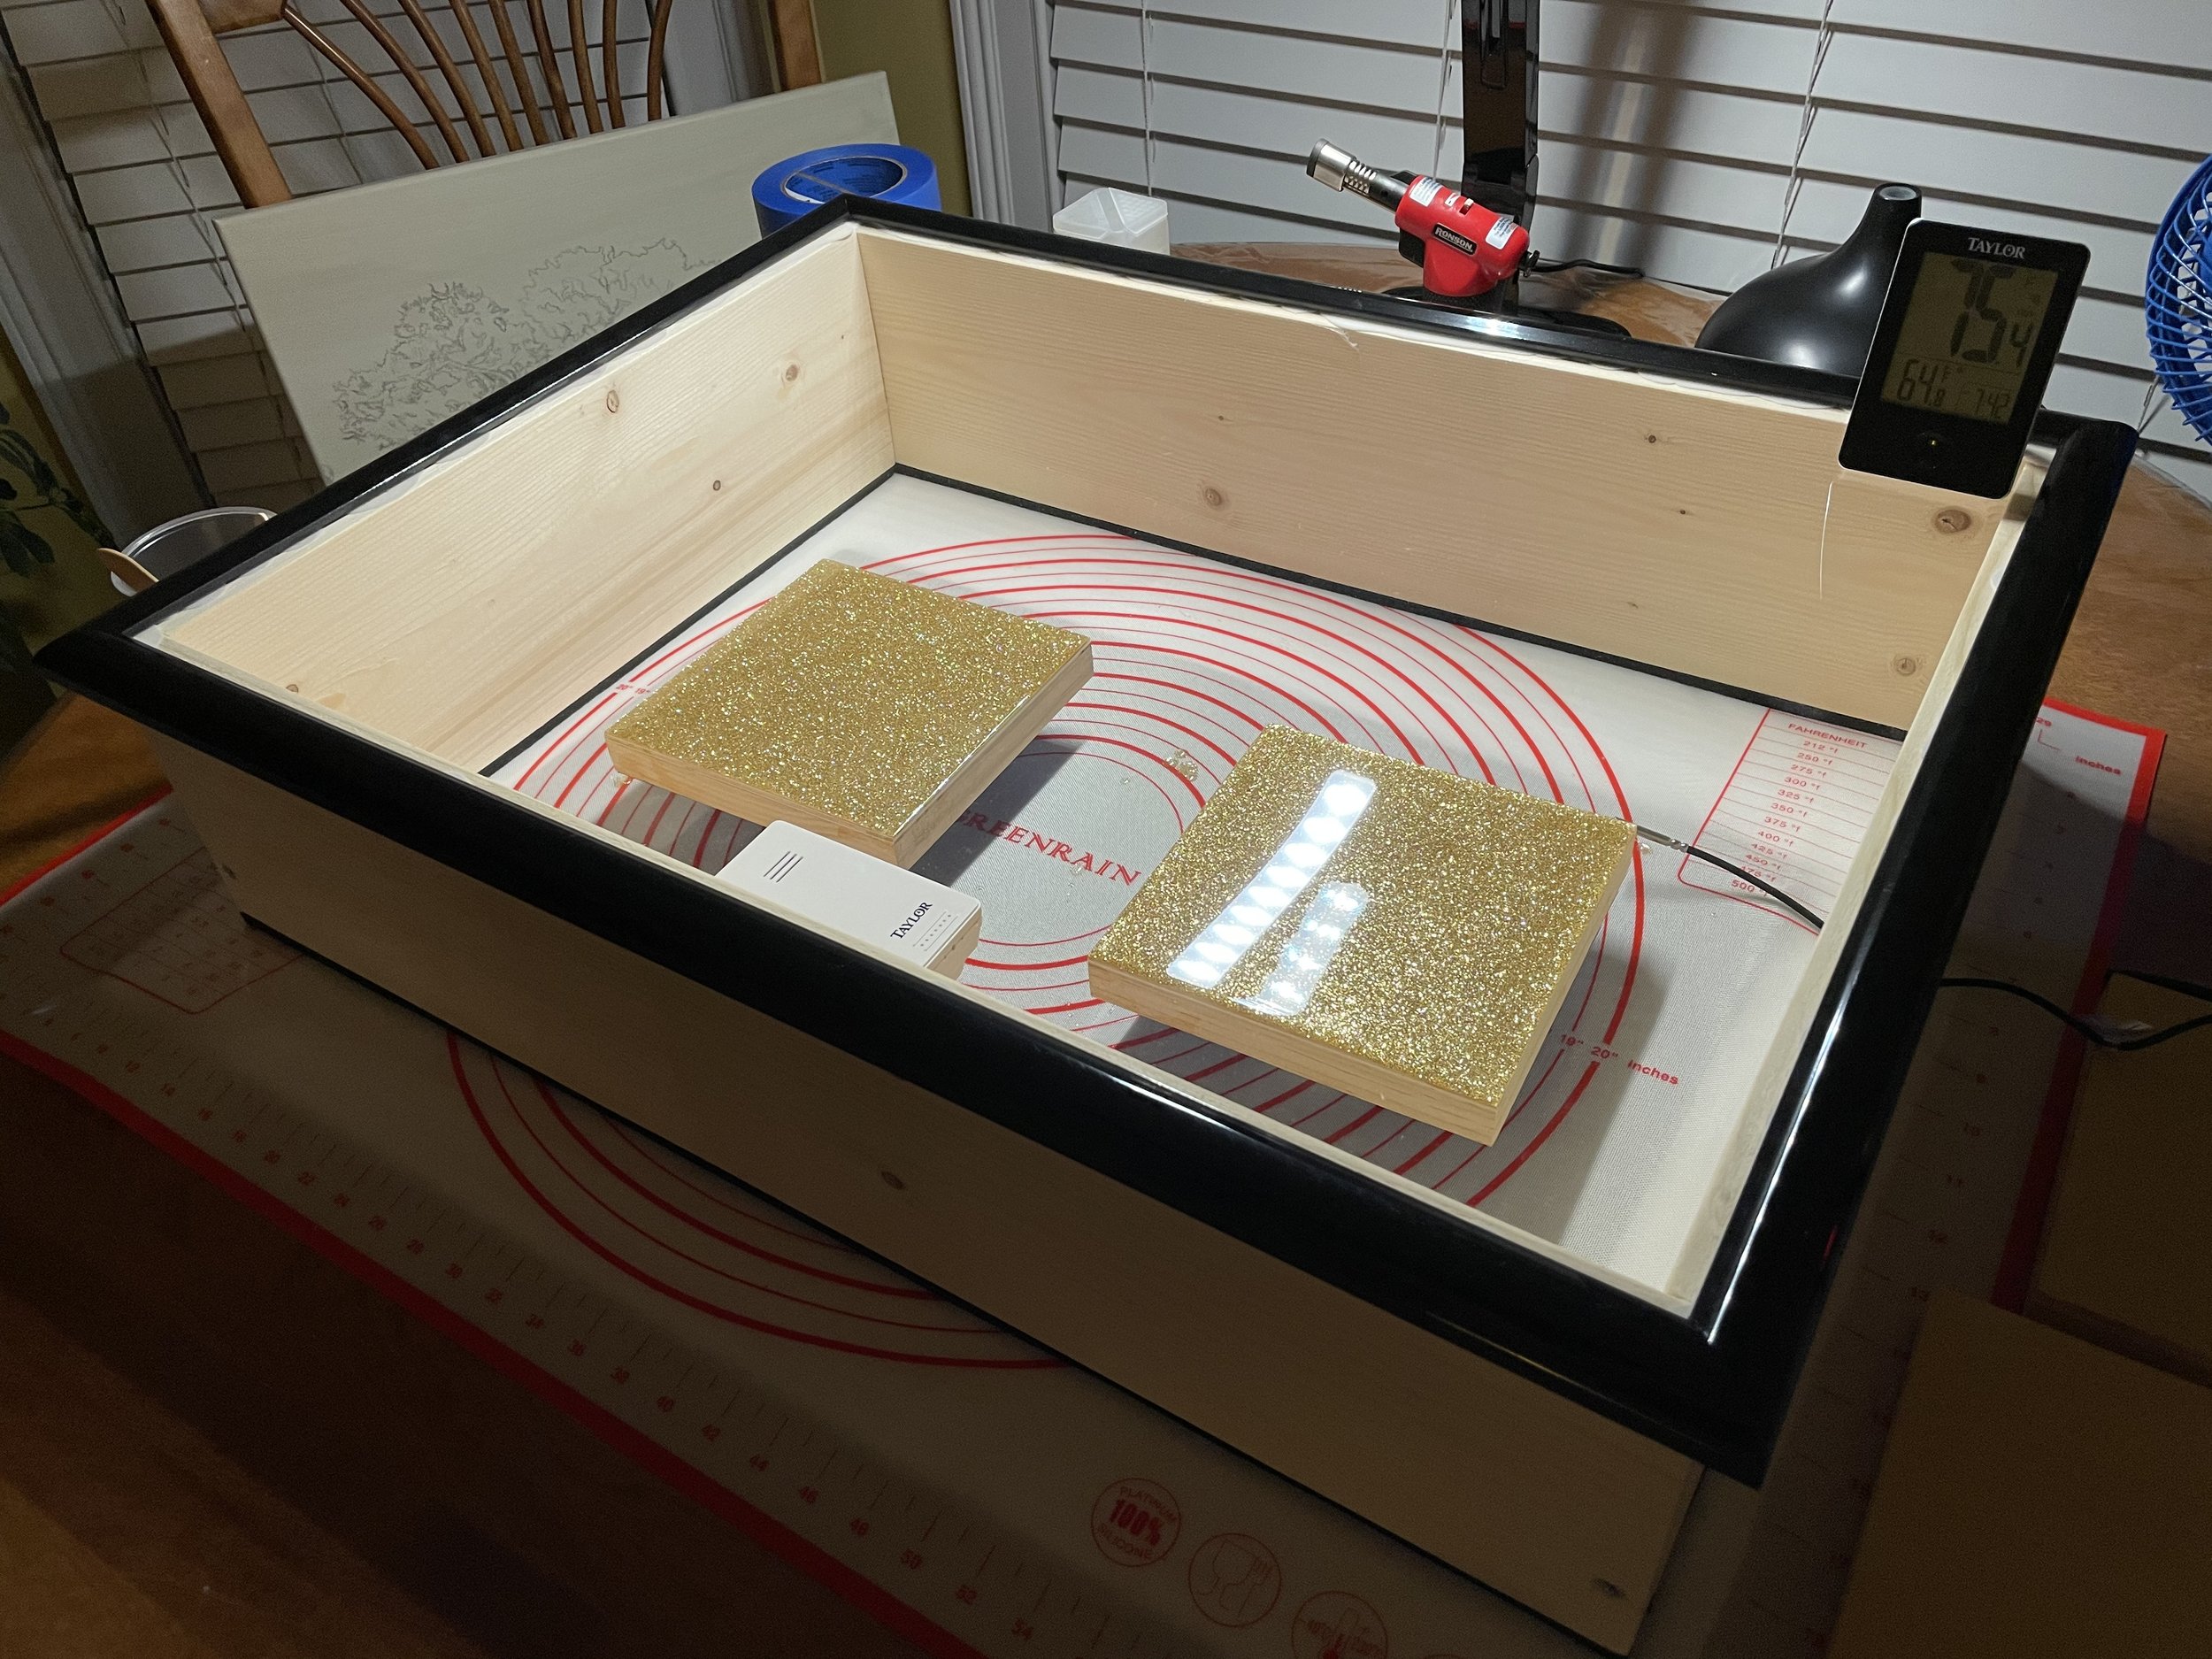
Now, the important part. I’ve talked about getting the resin to the needed temperatures, but this still doesn’t solve the problem of a cold room. You want the resin and hardener to mix properly, but if the room temperatures are below 72°, then you’re still going to have a drying problem like I mentioned earlier. This is where a space heater comes in handy, but these can also rack up quite the electric bill if you need it running for 24+ hours off and on. I decided to build a drying box for my resin art. Not only can I control the temperature, but I can also continue to work on other projects in my studio without having to worry about getting dust or anything else in the resin while it’s drying. Another plus, if you’re using resin that tends to put off some pretty strong fumes, a resin box like this will keep those fumes contained.
My Resin boxes!
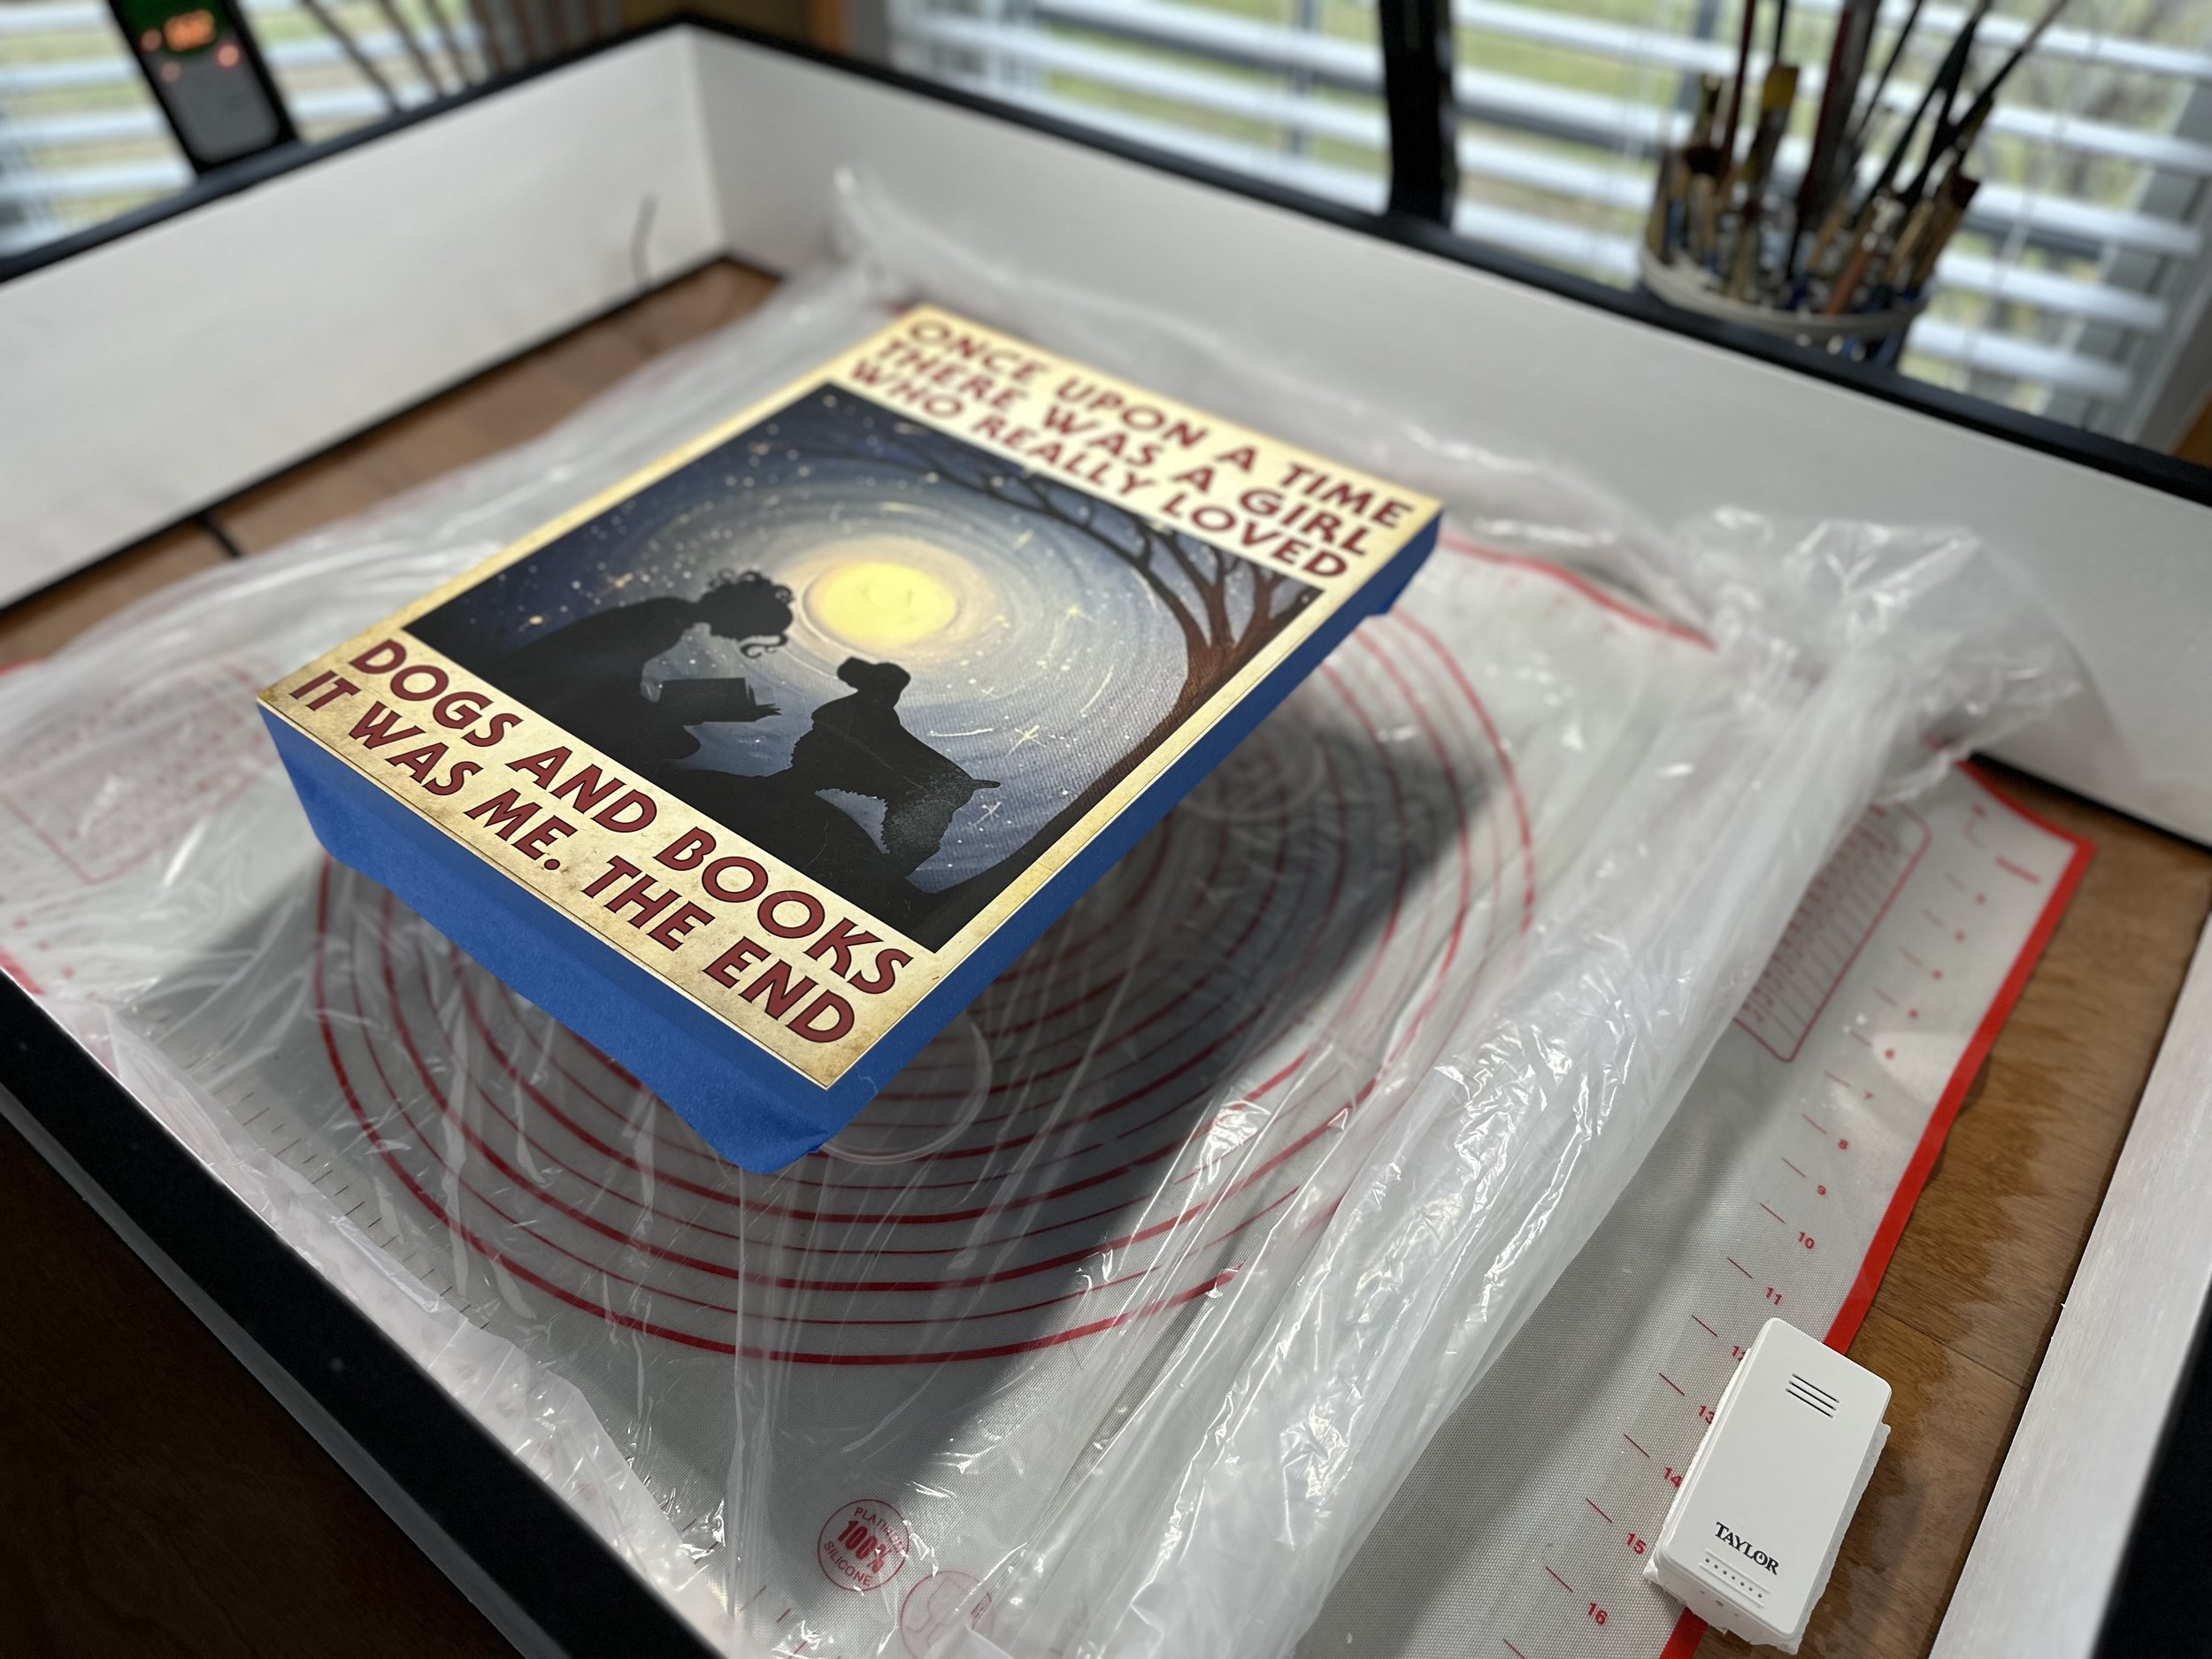
I’ve built two resin boxes out of some pine that I picked up from Lowe’s. Both use poster frames (of different sizes) as the top. On the small box (pictured below), I glued the frame to the wood, on the larger box (pictured above), I left it unglued since it was too difficult to lift the entire box off the table if I needed to pop an air bubble, or remove a speck of dust. I put a rubber seal on the bottom of both boxes that makes it practically airtight. On the larger box, I put a rubber seal on the top also, so that the poster frame sits flush and airtight.
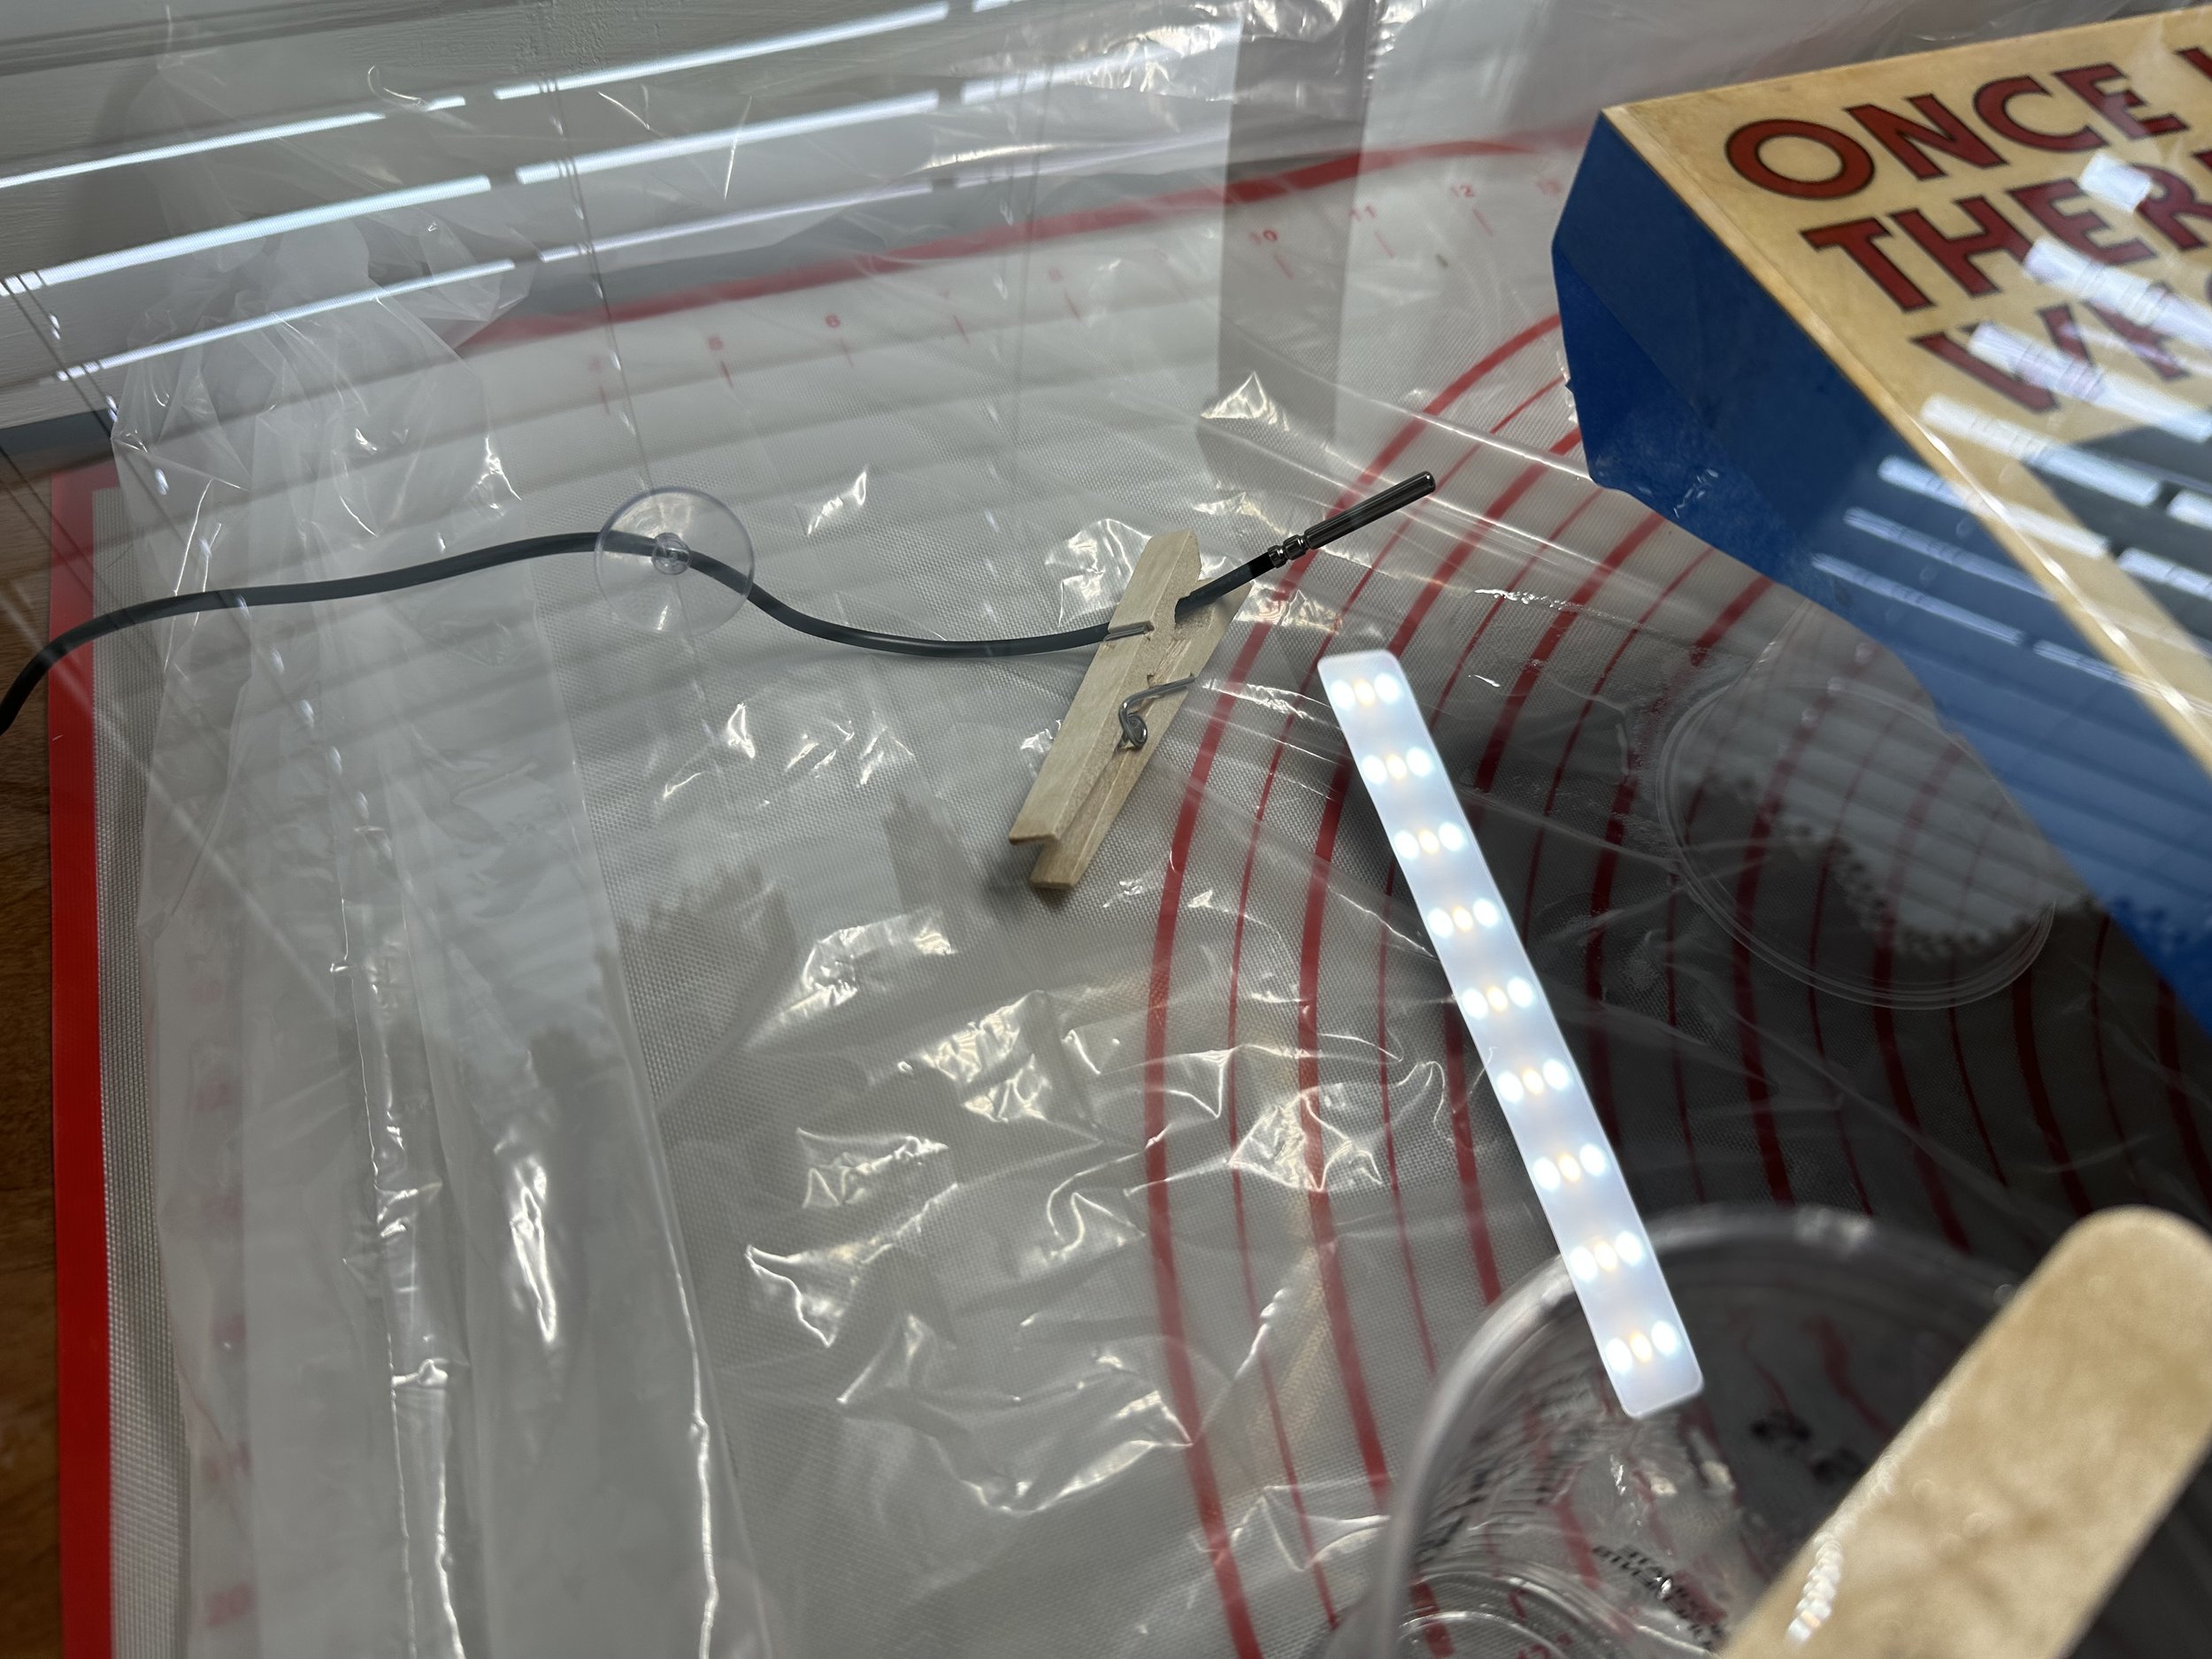
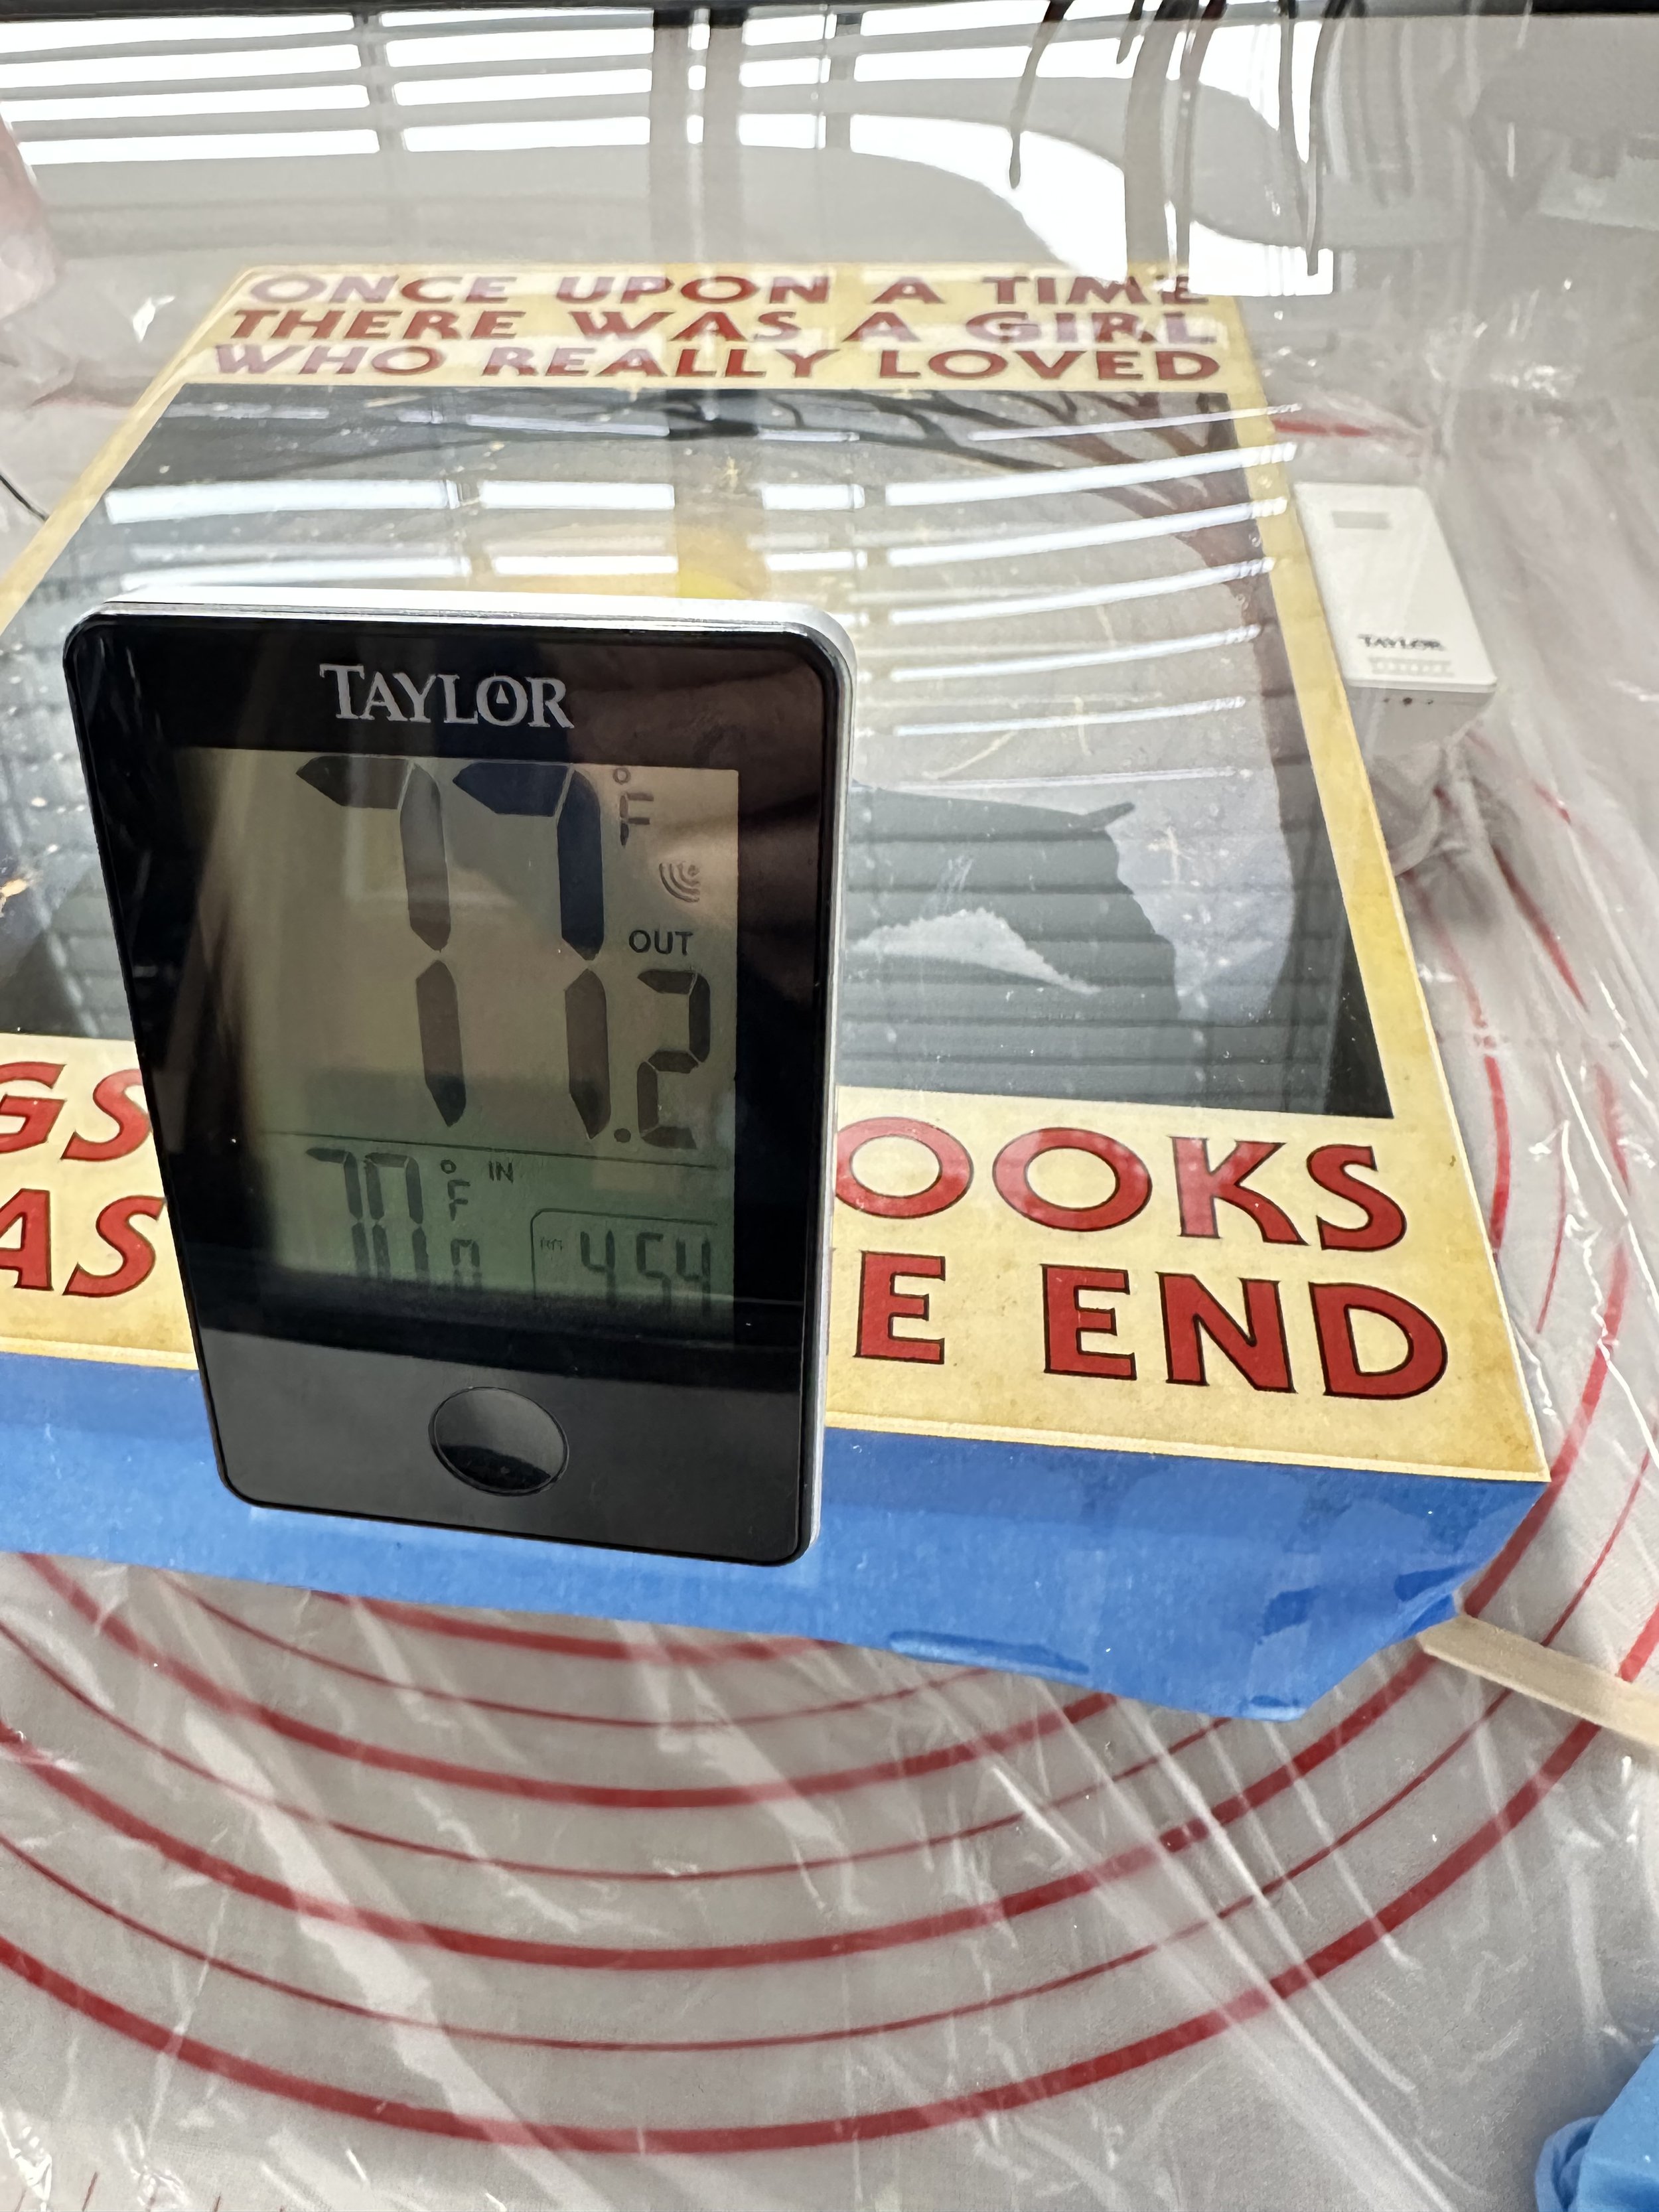
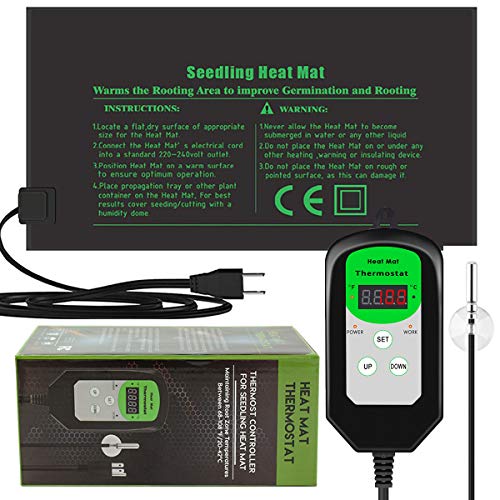
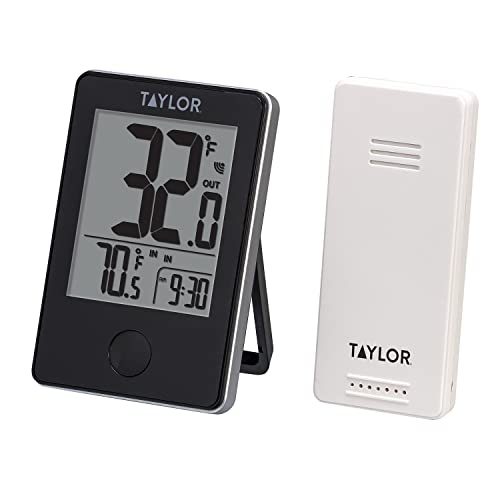
You’re probably wondering though, “but how does this keep it warm so that it can dry properly?” In the photos (above and below), underneath the silicone matte, I have a thin towel that helps me level my artwork. Under that towel is the key to it all. It’s a seedling heat mat! The same one I’ve been mentioning, and the same kind that you use to start growing tiny plants for your garden. The seedling mat has a small thermostat controller that I place inside of the box at about the same height as my art. I also have a sensor for a digital thermometer that I place in the box too. This allows me to keep an eye on the inside temperature with box the digital thermometer and the digital display that connects to the seedling mat. With the seedling mat warming the inside temperature of the drying box, I can quickly raise the temp from approximately 68° to 78° within 10-15 minutes. I can then leave it at 78° for 24-48 hours, all while using very little electricity.
If it works, it works
As the quote goes, “necessity is the mother of invention”. I’ve tried many things and some things worked and some things didn’t. For me, having something to provide temperature control while keeping away the dust was a win-win. I still use the resin boxes in warm weather, but the seedling mat finds its way back when the leaves start to fall.
Here’s the seedling mat (below) that I purchased from Amazon. I looked at several others and read through lots of reviews before deciding on this one. I highly recommend it. It’s very easy to use and the build quality is spot-on. Note, it’s a little stiff when it arrives (from being boxed up), but don’t be discouraged, just turn it on for a little while to let it warm up and it will flatten out. I also linked some of the other things that I use. I hope this has been helpful! :)
ArtResin has a great article about temps and curing on their website here.
If you have any questions, please reach out in the comment section below. I’ll respond back usually within a couple of hours. I want your resin projects to turn out perfect too! :)
Last but not least, the links back to Amazon reference my participant ID as part of their Associates Program where I earn money from qualifying purchases. Any money that I earn is always put back into my art supplies that help me continue to create. Thanks!